How to access a hosting account via SSH
To access your hosting account via SSH, you should:
1. Enable SSH access for your account in your web hosting panel.
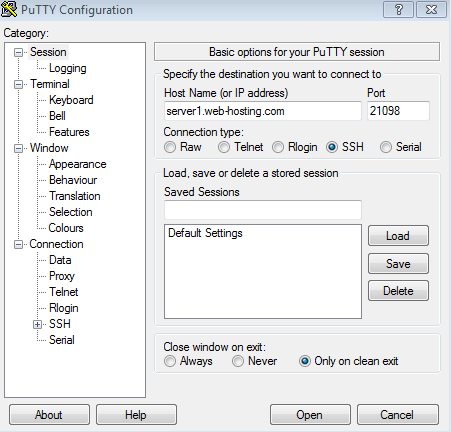
2. Open your SSH client, put your domain name or the IP address of the server into the Host Name field (you can also use server name here, you can check it using this tutorial), enter the SSH port specified by your hosting provider into the Port field (port 22 is common, but confirm the correct port with your provider), choose SSH as your connection type and press the Open button:
Port reminder: SSH and SFTP are different protocols and may use different ports. Namecheap’s support article, updated July 19, 2024, says SFTP is enabled by default on port 21098, while SSH access is enabled upon request. Do not assume the SFTP port is the SSH login port; confirm the SSH port with your provider. See Namecheap’s SSH access conditions.
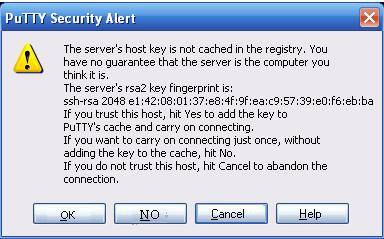
3. You will receive the Putty Security Alert. Press OK:
4. When prompted, enter your cPanel username and password (when you enter the password, it is automatically hidden for the security purposes):

That’s it!
Leave a Reply